In the world of interior design, open shelving has transitioned from a utilitarian storage solution into a definitive aesthetic statement. Whether you are aiming for a minimalist Scandinavian look, a cozy rustic farmhouse vibe, or an industrial chic atmosphere, the secret to a successful shelf often lies not in the plank itself, but in the hardware that holds it. While big-box retailers offer a plethora of metal brackets, there is an unparalleled charm and structural satisfaction in creating your own wooden supports.
Building your own DIY wall shelf brackets is an ideal project for both novice woodworkers and seasoned DIYers. It is an inexpensive endeavor that requires minimal tools, allows for complete customization, and transforms scrap lumber into functional art. This guide explores the essential methods for crafting three distinct styles of wooden brackets, offering a comprehensive look at the techniques, considerations, and professional tips necessary for a successful installation.

The Core Philosophy: Why Build When You Can Buy?
The primary advantage of custom-built brackets is the freedom of design. When you craft your own, you are no longer limited by the standard sizes or finishes found on store shelves. You control the exact depth, the thickness, and the decorative profile of your support.
From a structural standpoint, wood-on-wood connections often offer superior stability compared to flimsy metal alternatives. Furthermore, the ability to glue multiple pieces of lumber together allows you to create "chunky" architectural features—such as corbels—that provide a visual weight and permanence that mass-produced hardware simply cannot replicate. By utilizing scrap wood from previous projects, you are not only saving money but also engaging in a sustainable practice that minimizes waste.

1. The Minimalist: Simple Chunky DIY Wall Shelf Bracket
For those who appreciate clean lines and structural integrity, the chunky 4×4 bracket is the gold standard. This style is particularly effective in farmhouse or modern rustic interiors where simplicity is the ultimate sophistication.
The Construction Process
To begin, you will need a piece of 4×4 lumber. The beauty of this bracket lies in its geometric simplicity. Using a miter saw, you can create a perfectly angled support that provides maximum load-bearing capability while maintaining a compact footprint.

- Measuring and Cutting: Determine the desired height and depth of your bracket. A classic ratio is to ensure the height is slightly greater than the depth to prevent tipping.
- The Miter Cut: Using your saw, create an angled cut along the top edge. This creates a visually appealing slope that directs the eye upward.
- Refining the Finish: Once cut, sand the wood thoroughly to remove any splinters or rough grain. If you intend to paint or stain the bracket, now is the time to apply your finish before mounting.
Installation Strategy
To mount these, pre-drill two holes through the angled face of the bracket. The key to a secure shelf is anchoring directly into the wall studs. Use 3-inch wood screws to ensure the bracket is biting deep into the structural framing of your home. If your studs do not align with your desired shelf location, heavy-duty toggle bolts or high-quality drywall anchors are essential to ensure safety. Always utilize a laser level; even a minor misalignment will be magnified once the long shelf board is installed.
2. The Artisan: Basic Curved Wall Shelf Bracket
If your home decor leans toward the traditional or cottage-core aesthetic, a curved bracket is the perfect choice. This style allows for more creative expression and is an excellent way to practice using a jigsaw or scroll saw.

Crafting the Curves
You will typically need a 2×8 board to provide enough surface area for a significant curve.
- Template Creation: The most reliable way to achieve consistency is to create a cardboard template first. Draw your desired curve, cut it out, and trace it onto your wood.
- Precision Cutting: Use a jigsaw with a scroll-cutting blade for tight corners. Move slowly, letting the blade do the work to avoid burning the wood.
- Smoothing the Edges: A spindle sander or a hand-held sanding block is vital here. You want the curve to be perfectly smooth to the touch, as this is the "signature" of a well-made custom piece.
Decorative Flourishes
For a professional touch, consider using a router with a round-over bit. This softens the edges of the wood, giving it a high-end, store-bought look. For hanging, use keyhole hangers recessed into the back of the bracket. This creates a "floating" look where the hardware is hidden, leaving only the beautiful curve of the wood visible.

3. The Classic: Vintage Layered Wall Shelf Bracket
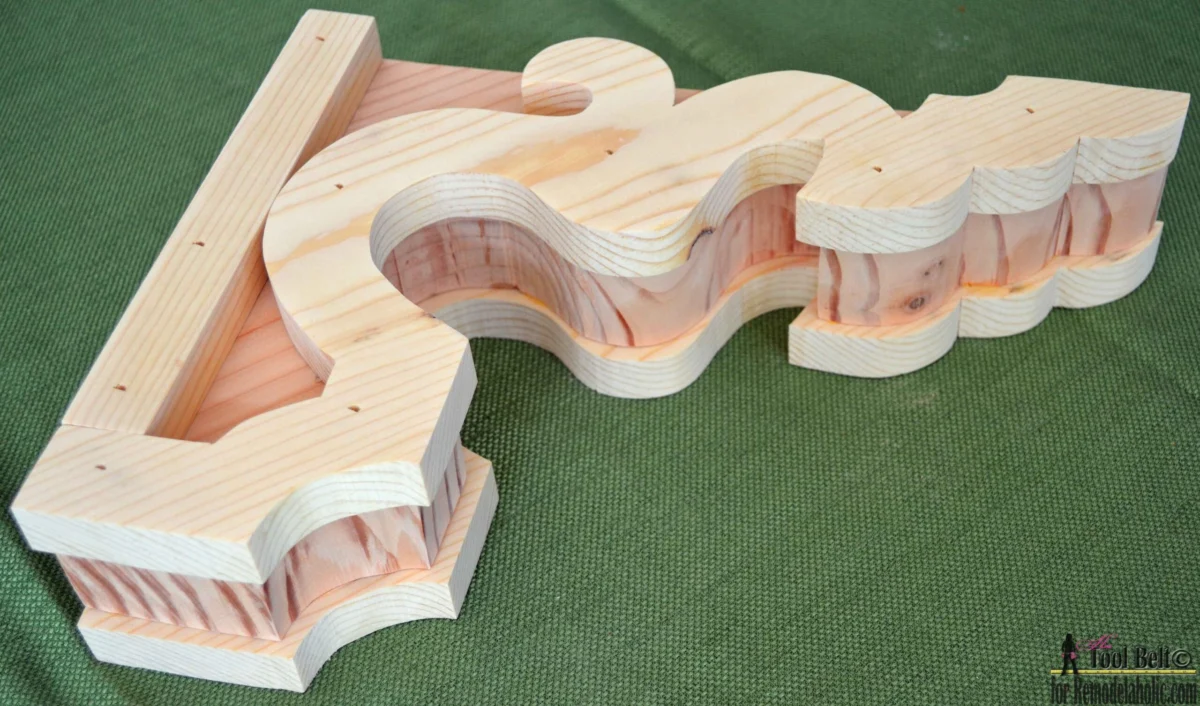
For a truly architectural look, the layered bracket—or corbel—is unparalleled. This design involves stacking multiple pieces of wood to create a deep, ornate profile. It mimics the look of vintage Victorian or early American shelving supports.
The Assembly
This project requires a 1×8 for the backplate and a 2×10 for the support section.

- Layering: By cutting the support piece to a specific shape and attaching it to a vertical backplate, you create a sense of depth and shadow.
- Bonding: Use high-quality wood glue in addition to finish nails or screws. The glue is the most important component here; it creates a bond that is stronger than the wood itself.
- Detailing: Many woodworkers use wood filler on the nail holes and finish with a distressed paint technique to give the piece an authentic "antique" appearance.
Supporting Data and Technical Considerations
Load-Bearing Capacity
A common concern for DIYers is the weight limit. It is important to distinguish between decorative shelving and functional storage. When using a 1 1/2-inch thick shelf board of 30 inches or less, attached securely to two wall studs, you can reasonably expect a capacity of 20+ pounds per bracket.
However, "weight capacity" is a dynamic variable. Factors include:

- Substrate: Are you mounting to solid wood studs, or is there plaster, lathe, or masonry involved?
- Fastener Depth: The screw must penetrate the stud by at least 1.5 inches to be considered "load-bearing."
- Leverage: The further out the shelf extends from the wall, the more pressure is placed on the bottom edge of the bracket.
The "Overhang" Rule
A common design error is having too much of the shelf overhang the bracket. Structurally, the shelf should not extend more than 2–3 inches beyond the front tip of the bracket. A greater overhang can cause the shelf to tip or put undue stress on the fasteners, leading to wall damage over time.
Implications of Professional Installation
Regardless of how well-crafted your bracket is, the installation is the final judge of success. If you are mounting shelves in a high-traffic area, such as a bathroom or kitchen, consider adding a horizontal support cleat. This is a thin piece of wood screwed into the wall studs along the entire length of the shelf, providing a "cradle" for the back of the board. This drastically increases the weight limit and prevents the shelf from sagging over time.

Addressing the "Disappearing" Bracket
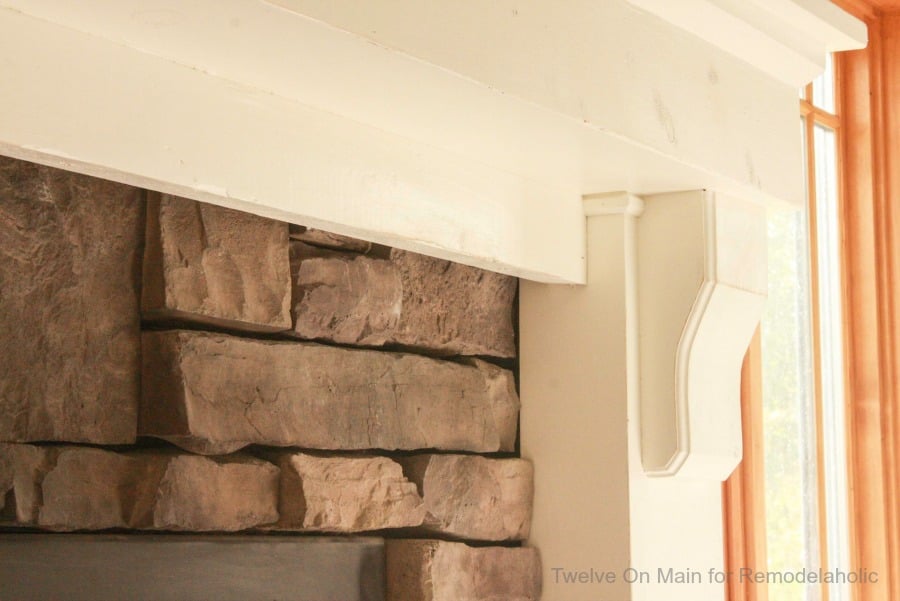
For those who prefer a sleek look, there are methods to make brackets "disappear" or appear as if they are part of the wall casing. By painting the brackets the exact same color and finish as your wall (or your trim), you allow the shelf to take center stage. This technique is popular in high-end design, where the goal is to draw attention to the displayed objects rather than the hardware.
Final Thoughts for the Aspiring Maker
Building your own shelf brackets is a rite of passage for the modern homeowner. It teaches the fundamentals of geometry, the importance of structural integrity, and the joy of creating something unique. Whether you choose the minimalist 4×4 approach, the intricate curved design, or the architectural layered corbel, the result will be a piece of home decor that tells a story of craftsmanship.
Before you begin, remember the cardinal rule of woodworking: measure twice, cut once. Always prioritize safety by wearing appropriate eye and ear protection when using power tools. With the right preparation and a bit of patience, your walls will soon be adorned with custom shelving that is as sturdy as it is beautiful.